Friday, December 26, 2008

Exercise 6 - 1041107964

The last output

after that I used the mask so I select the 70's by pressing ctrl + click the made sure that the 20 note is highlight then i clicked on the add layer mask so 70 will look like what in the image .
I open the not of 20 then the edited using hue and saturation then i used the filter Gaussian blur I opened the curves and load what I saved and applied on the 20 so it will be good background of 70's

after I created two copies of the alpha 2 the I moved the both of them in different way , I went to image then calculations and change of the blending to difference
I select the 70's the i WENT TO EDIT THEN STROKE


I went to channel created new layer called alpha one
the n I took the brush to make some shapes after that I applied some affects using filter
first i opened the psd file which white background

Thursday, December 18, 2008

Exercise 5 - 1041107964


The final out put

create smok going up from the youga man head in this by drwing shape of smok using the tool lasso the fill up with cloud then using the filter blue glossy
I cpyed the fire flame to the other heand I went to the edit the transform/flip horizontal
in this step I slect the flame by going to the layer of the flame then hold ctrl +click then create mask on the layer that filled up with color cloud so that fire will be created
create new layer then I use Rectangular Marquee to create rectangular the I fill up with cloud the use red and yellow
i create new layer the I choose the brush that i created the flame shape and I change the color to white , then I created flames that will look like fire
I saved the shape of the flame that I have created as brush shape so I can this shape
I colored the the edge of the flame using the Brush i change the tool setting so I make the hardness 0% so I can use in this step
this step how to create flame i used Lasso and that by drawing the shape of the flame creat new layer the fill up the selection by ctrl+delete
this background's final step is go to the filter render the light effect then then choose alpha one that i created then change the light place so I get nice background
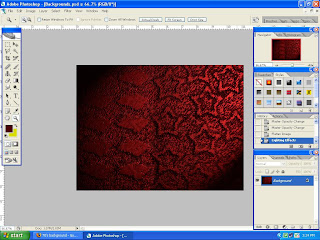
in this step I created channel I called it alpha then I fill it with with cloud also then the i applied on the cloud and glass filter then created new layer then I fill up red and black color using also the cloud.
creat new layer the I fill up using filter then render the cloud


the first step is creating the background using the magic wand I clear the organli background

Thursday, December 11, 2008

Exercise 4 :)

The last output
the last thing I'm doing is go to layer stel and click on blend interior effects as group and I reduce the opacity to make the work nicer
after this I choose the bursh and I strat painting the image
now I click on the triangle tool then drag it from the angle of the image to other angle in this case there be layer and channel after create mask that I will fill up by holding ctrl then delete fill up the
*after this i go bevel and emboss the then select texture then i slect the the texture that I save as pattern
*after I save the style that I create then I aplle this style on all objects the image

open the channel then there will there the RGB so I'm going to choose the blue then copy it as new layer in the channel then go to edit define it as pattern
1.dropping shadow and edit it
2.inner shadow inner glow
after selecting the channel i click on layer style then gradient overlay
1. change the color
2.change the angle so the color will start from the point you and with another color
3.change the distance
4.change the size

I select the by holding ctrl clicking the on the channel


The original image before editing

Thursday, December 4, 2008

Exercise 3

final output

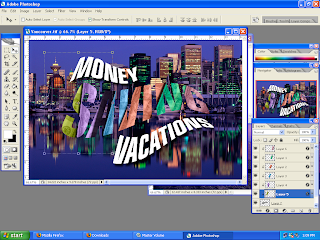
  • making a channel for the words ( money,vacations)and will be by 1st select using magic wand then create new layer the create channel ,then fill up the words by pressing ctrl+del . after this I drag the pictures arranging them so the cover the words nicely the hold the key alt then go to the line between the layers and the click so the word will be filled with picture
  • after arranging the images i hold alt go to the line of each layer and click so the the word(saving ) will be fill up with images of the note
  • After I drag the picture of the note I arrange the note so each note cover every part of the word
  • I changed the note color and add picture .create new layer then change the style of the layer to the mod color , use the tool brush to to color the note
  • select the channel then hold ctrl +click after i do so then , i fill up the word that has been selected by pressing ctrl+del drag the picture of the note to the background
----------------------------------------------------------------------------------------------


  • Reference

2nd appalling what they call it filter 


First step select the channel after this creating new layer  then fill up by pressing  ctrl+del


the original